If you have some on-prem workloads (either virtual or physical servers) and you want to migrate them to Azure, this post might be for you. I’ll describe how to migrate these servers in Azure using Azure Migrate and Azure Site Recovery. These tools (actual VMs) will have to be installed in your on-prem environment and they’ll do the heavy lifting for you. Before I begin, there are some pre-requisites. You’ll need a valid Azure subscription, supported VMware vCenter (v5.5 and above) and resources to install two VMs. On my ESXi host, using thin provisioned storage, I needed 8 CPUs, 32GB RAM and 20GB-80GB thin provisioned storage for Azure Migrate: Server Assessment and 8CPUs, 32GB RAM and 40GB disk for Azure Migrate: Server Migration tool. It will take much more space if you have a lots of VMs. I have about 15. You’ll also need a VNET(s) and subnet(s) where you’ll migrate the VMs.
I’ll configure that first. I’ll give you an example of how to migrate a two-tier Windows application (web server + MS SQL server) and a WordPress server running on two CentOS 7 servers.
Azure VNET/subnet
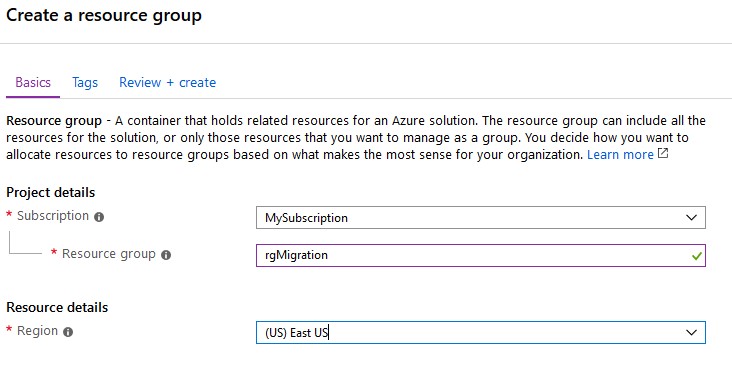
Log to your Azure subscription and create a resource group for the migration. I’ll name mine rgMigration.
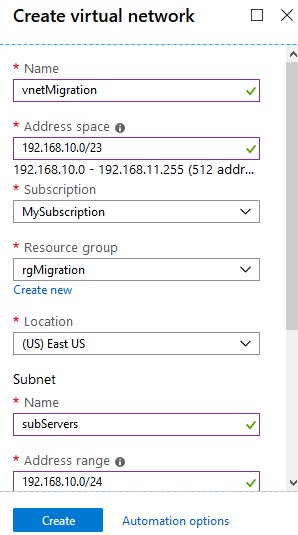
Then create a new VNET and a subnet where you’ll migrate your VMs. You can use the same subnets as on-prem but only if you don’t have a ExpressRoute or VPN between on-prem and Azure. In my case, I have a VPN between my home-lab and Azure, so I have to choose a different subnet. I named my VNET vnetMigration and the subnet subServers.
Azure Migrate
Once completed, in the Azure portal in the middle upper search field, start typing migrate and select Azure Migrate.

You’ll be presented with different options to migrate data, SQL, servers etc. Choose this one that says migrate servers.

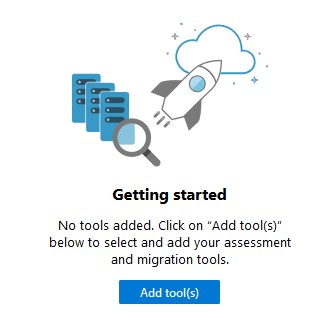
Click on Add tool(s).
You’ll be prompted to choose the subscription, the resource group, name the project and choose the region. Use whatever suits your needs and click Next.
This is just a sample. The original post is here.